What’s newFor teachers
How to use Teaching tools in your lessons
The classroom now has Teaching tools: reward stickers, text and pictures on your camera, and camera layouts. They're built in, so you don't need an extra camera app, and they don't touch your video, so the call stays as smooth as before. You can also blur what's behind you or put a picture there (see Blur or a picture behind you below).
Where you find them
- On a computer: in a lesson, press the sparkles button in the bottom bar, next to the raised hand.
- On a phone or small tablet: press ⋯ (More options) and choose Teaching tools.
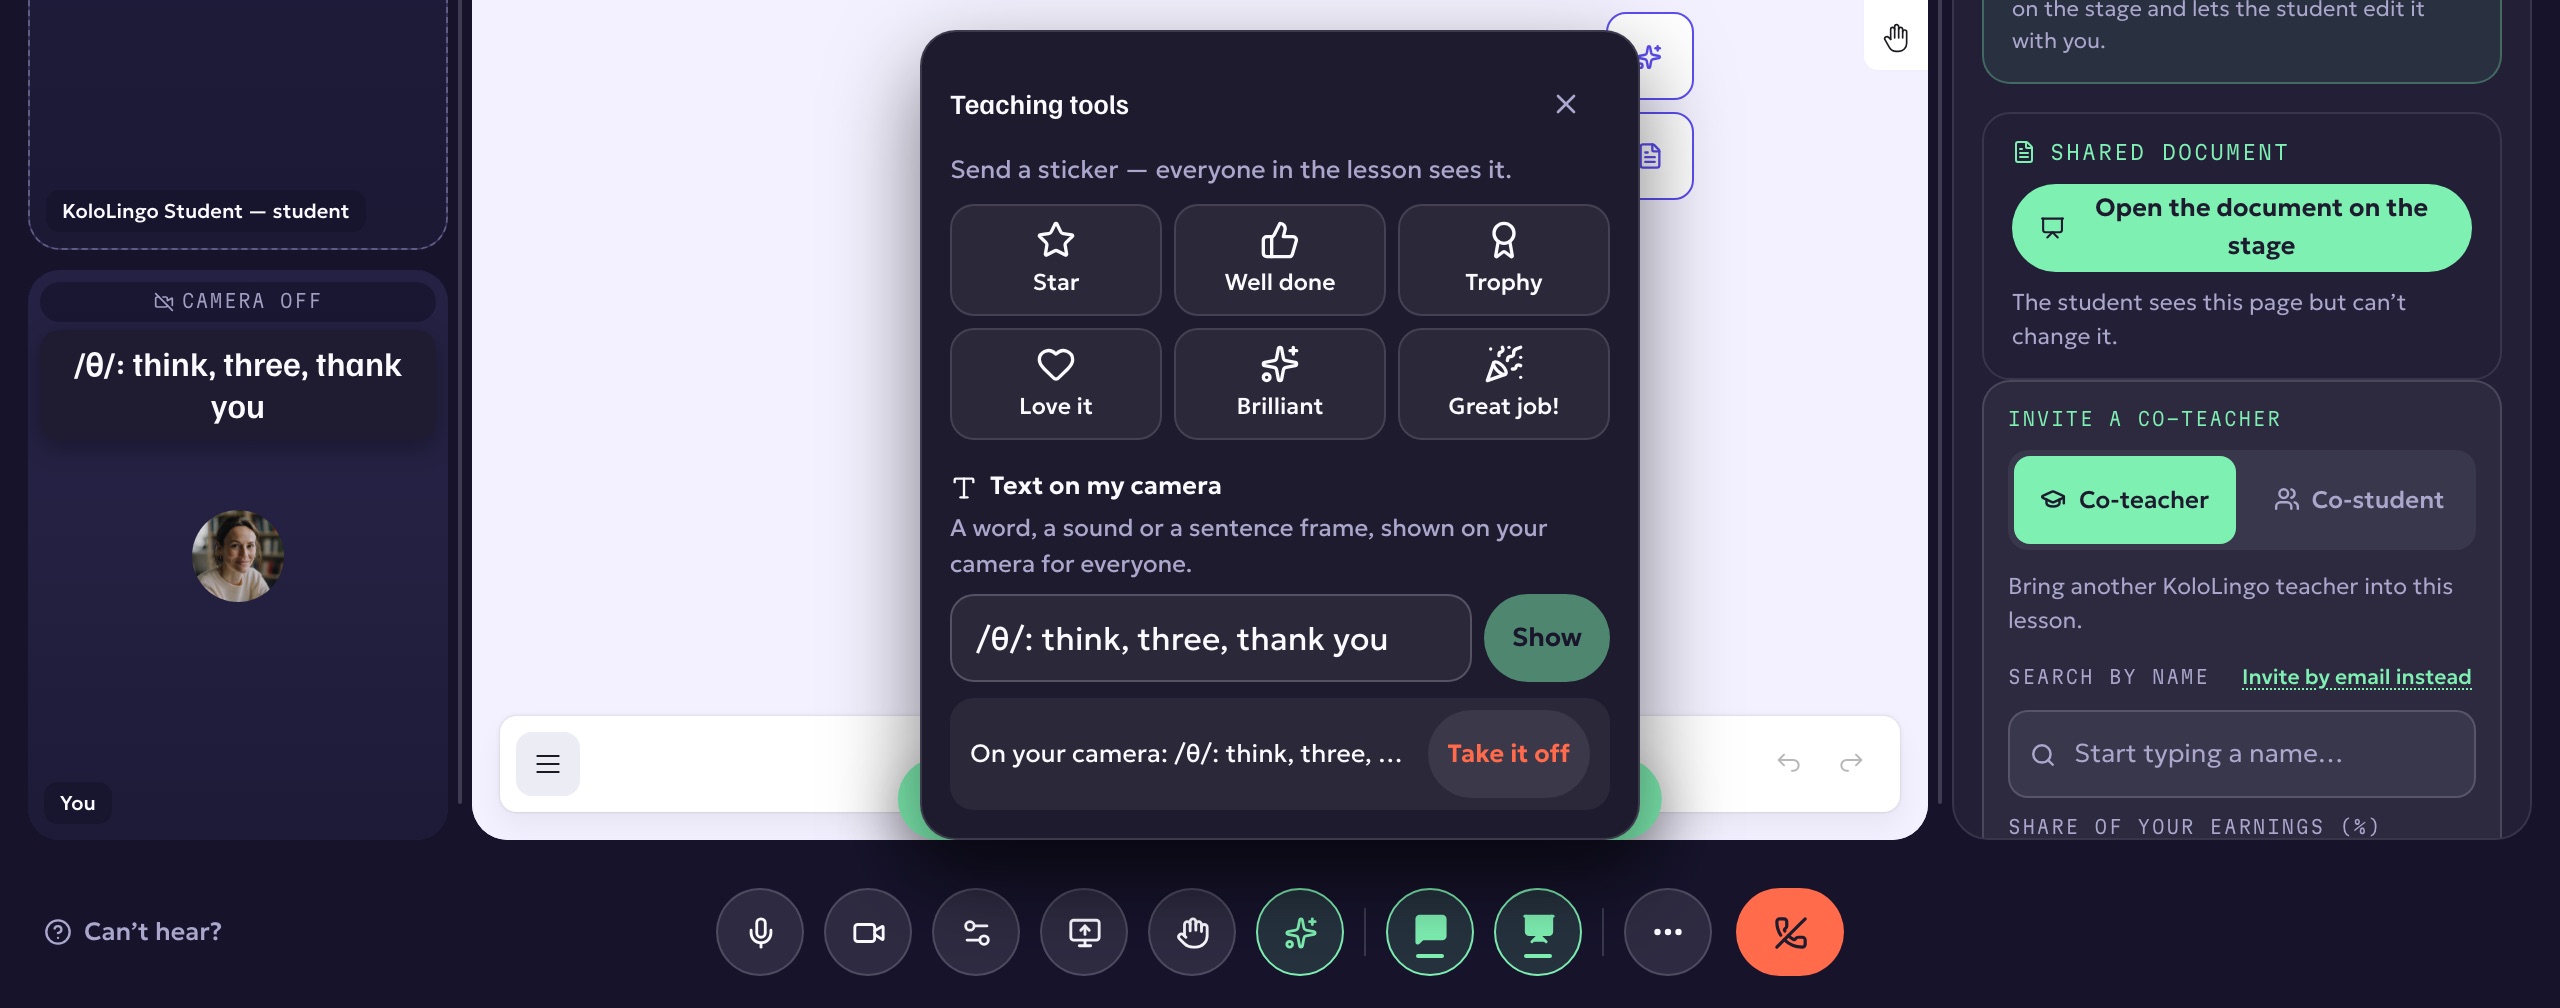
Only teachers see the tools. Your students see what you send.
Reward stickers
Press Star, Well done, Trophy, Love it, Brilliant or Great job!. The sticker pops up on everyone's screen for about two seconds, including yours, so you know it went out. It's also in the lesson recording, if you record.
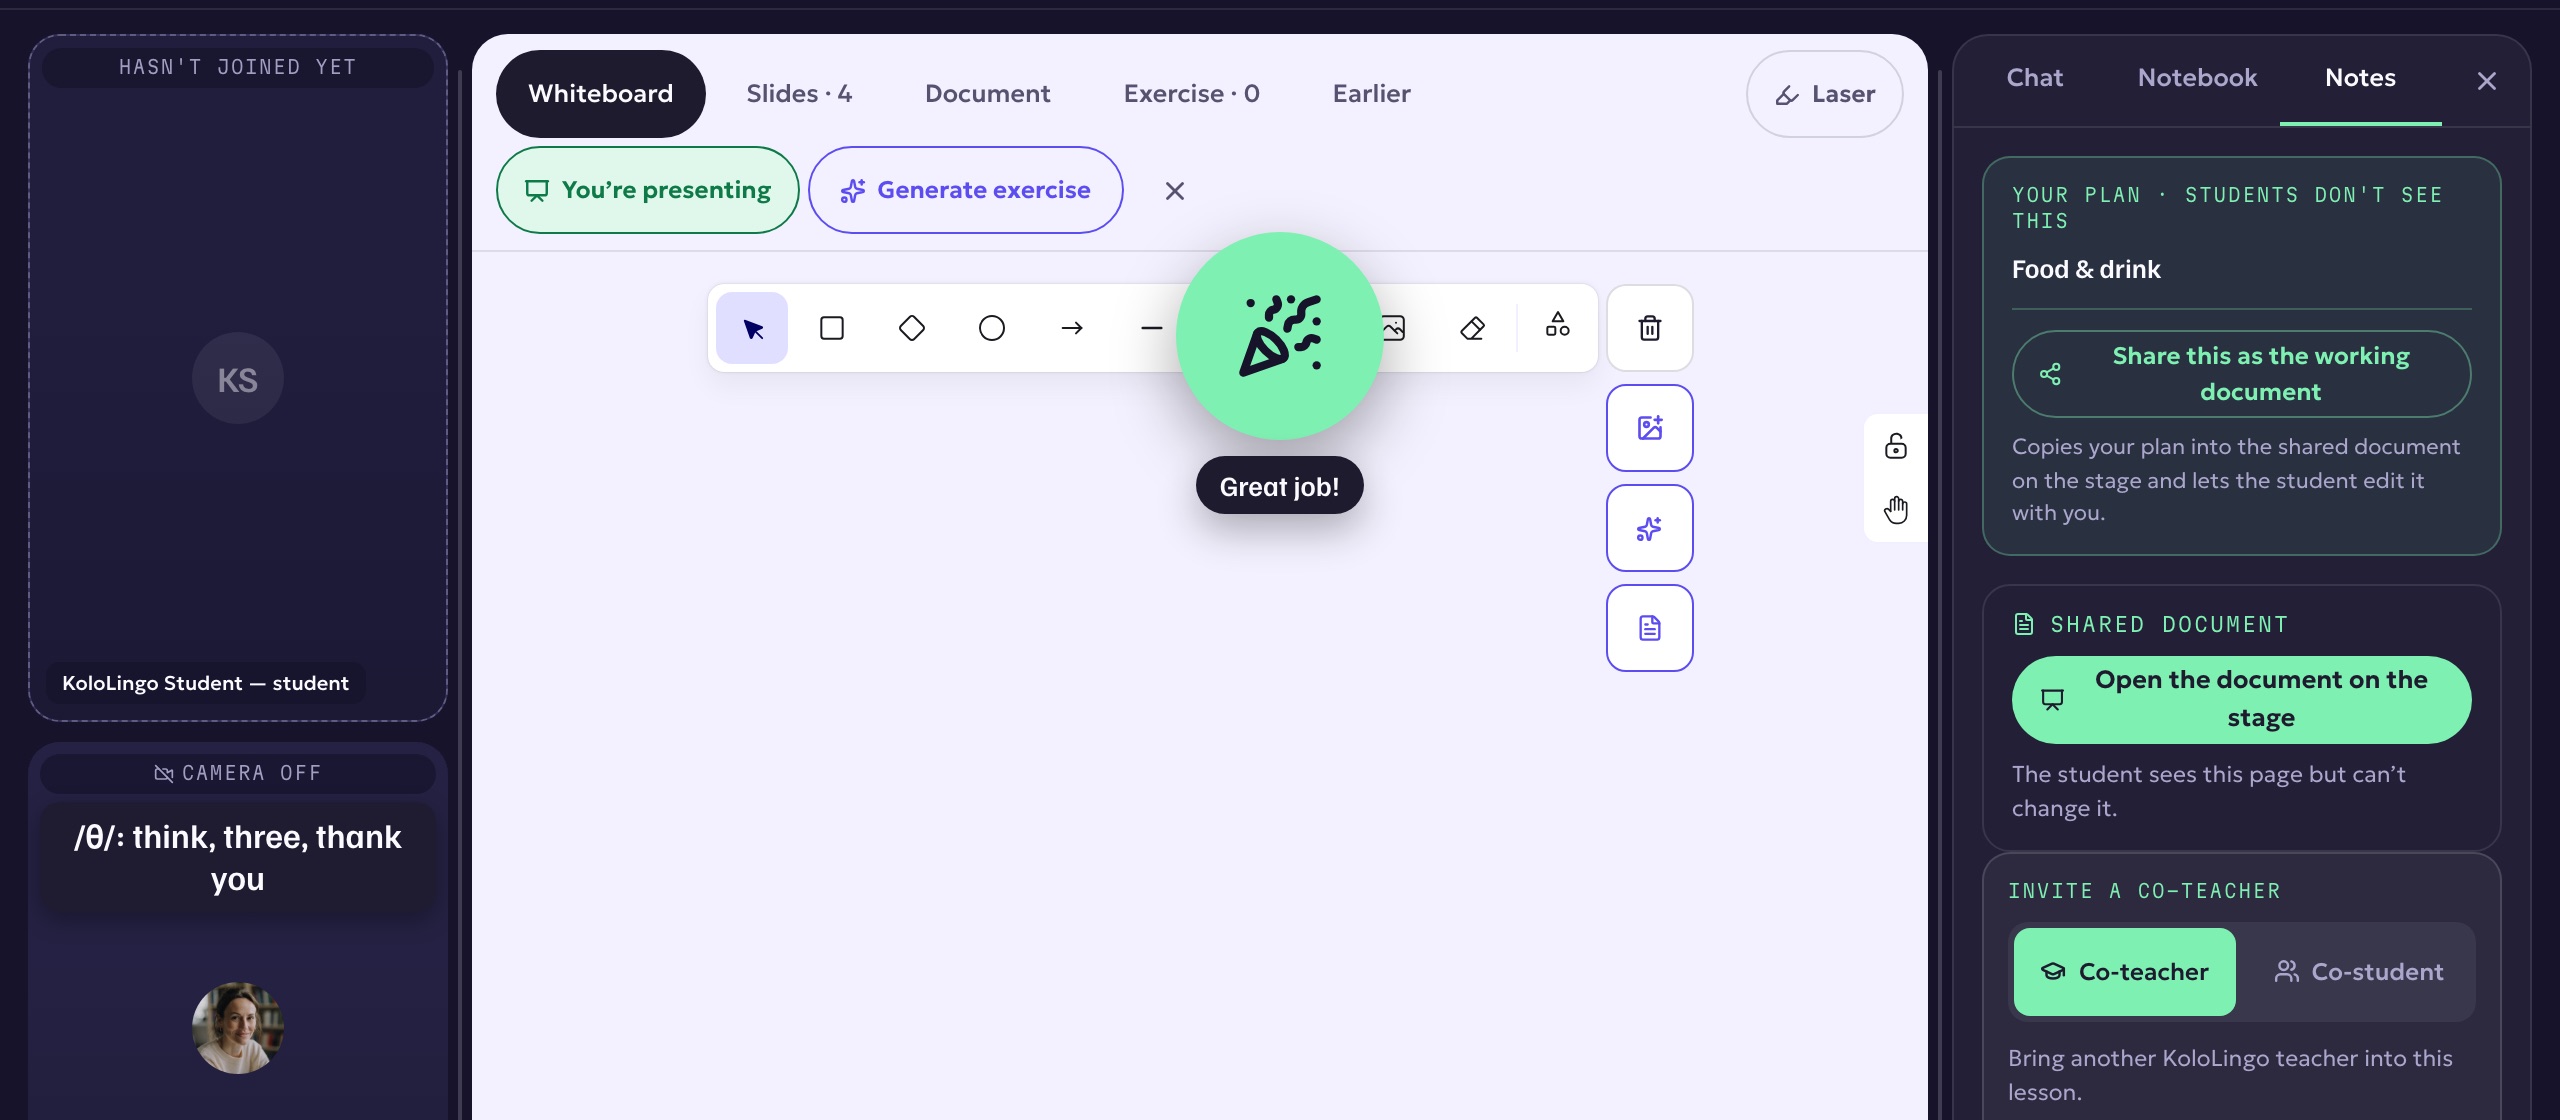
Use them for the small wins: a hard sound said right, a full sentence without help, homework done. Younger learners especially love them.
Text on your camera
- Under Text on my camera, type a word, a sound, a short phrase or a sentence frame (up to 80 characters), for example /θ/: think, three, thank you or I would like ___, please.
- Press Show (or Enter). The text appears on top of your camera picture for everyone in the lesson, and in the recording.
- To change it, type something new and press Show again. To remove it, press Take it off.
Students who join late or reconnect see your text as soon as they arrive. When you leave the lesson, it goes with you.
A picture on your camera
Show a picture on your own camera for everyone: the apple you are naming, a flag, a picture card for a story.
- Open Teaching tools and go to Picture on my camera.
- Pick one of the pictures already in this lesson. If there are none yet, press Upload a picture to add one from your computer or phone, or From my library to copy one in from your files. A new picture appears on your camera straight away.
- Choose where it sits (top left, top right, bottom left, bottom right or the centre) and how big it is (Small, Medium or Large).
- To show a different one, pick it. To remove it, press Take the picture off, or press the highlighted picture again.
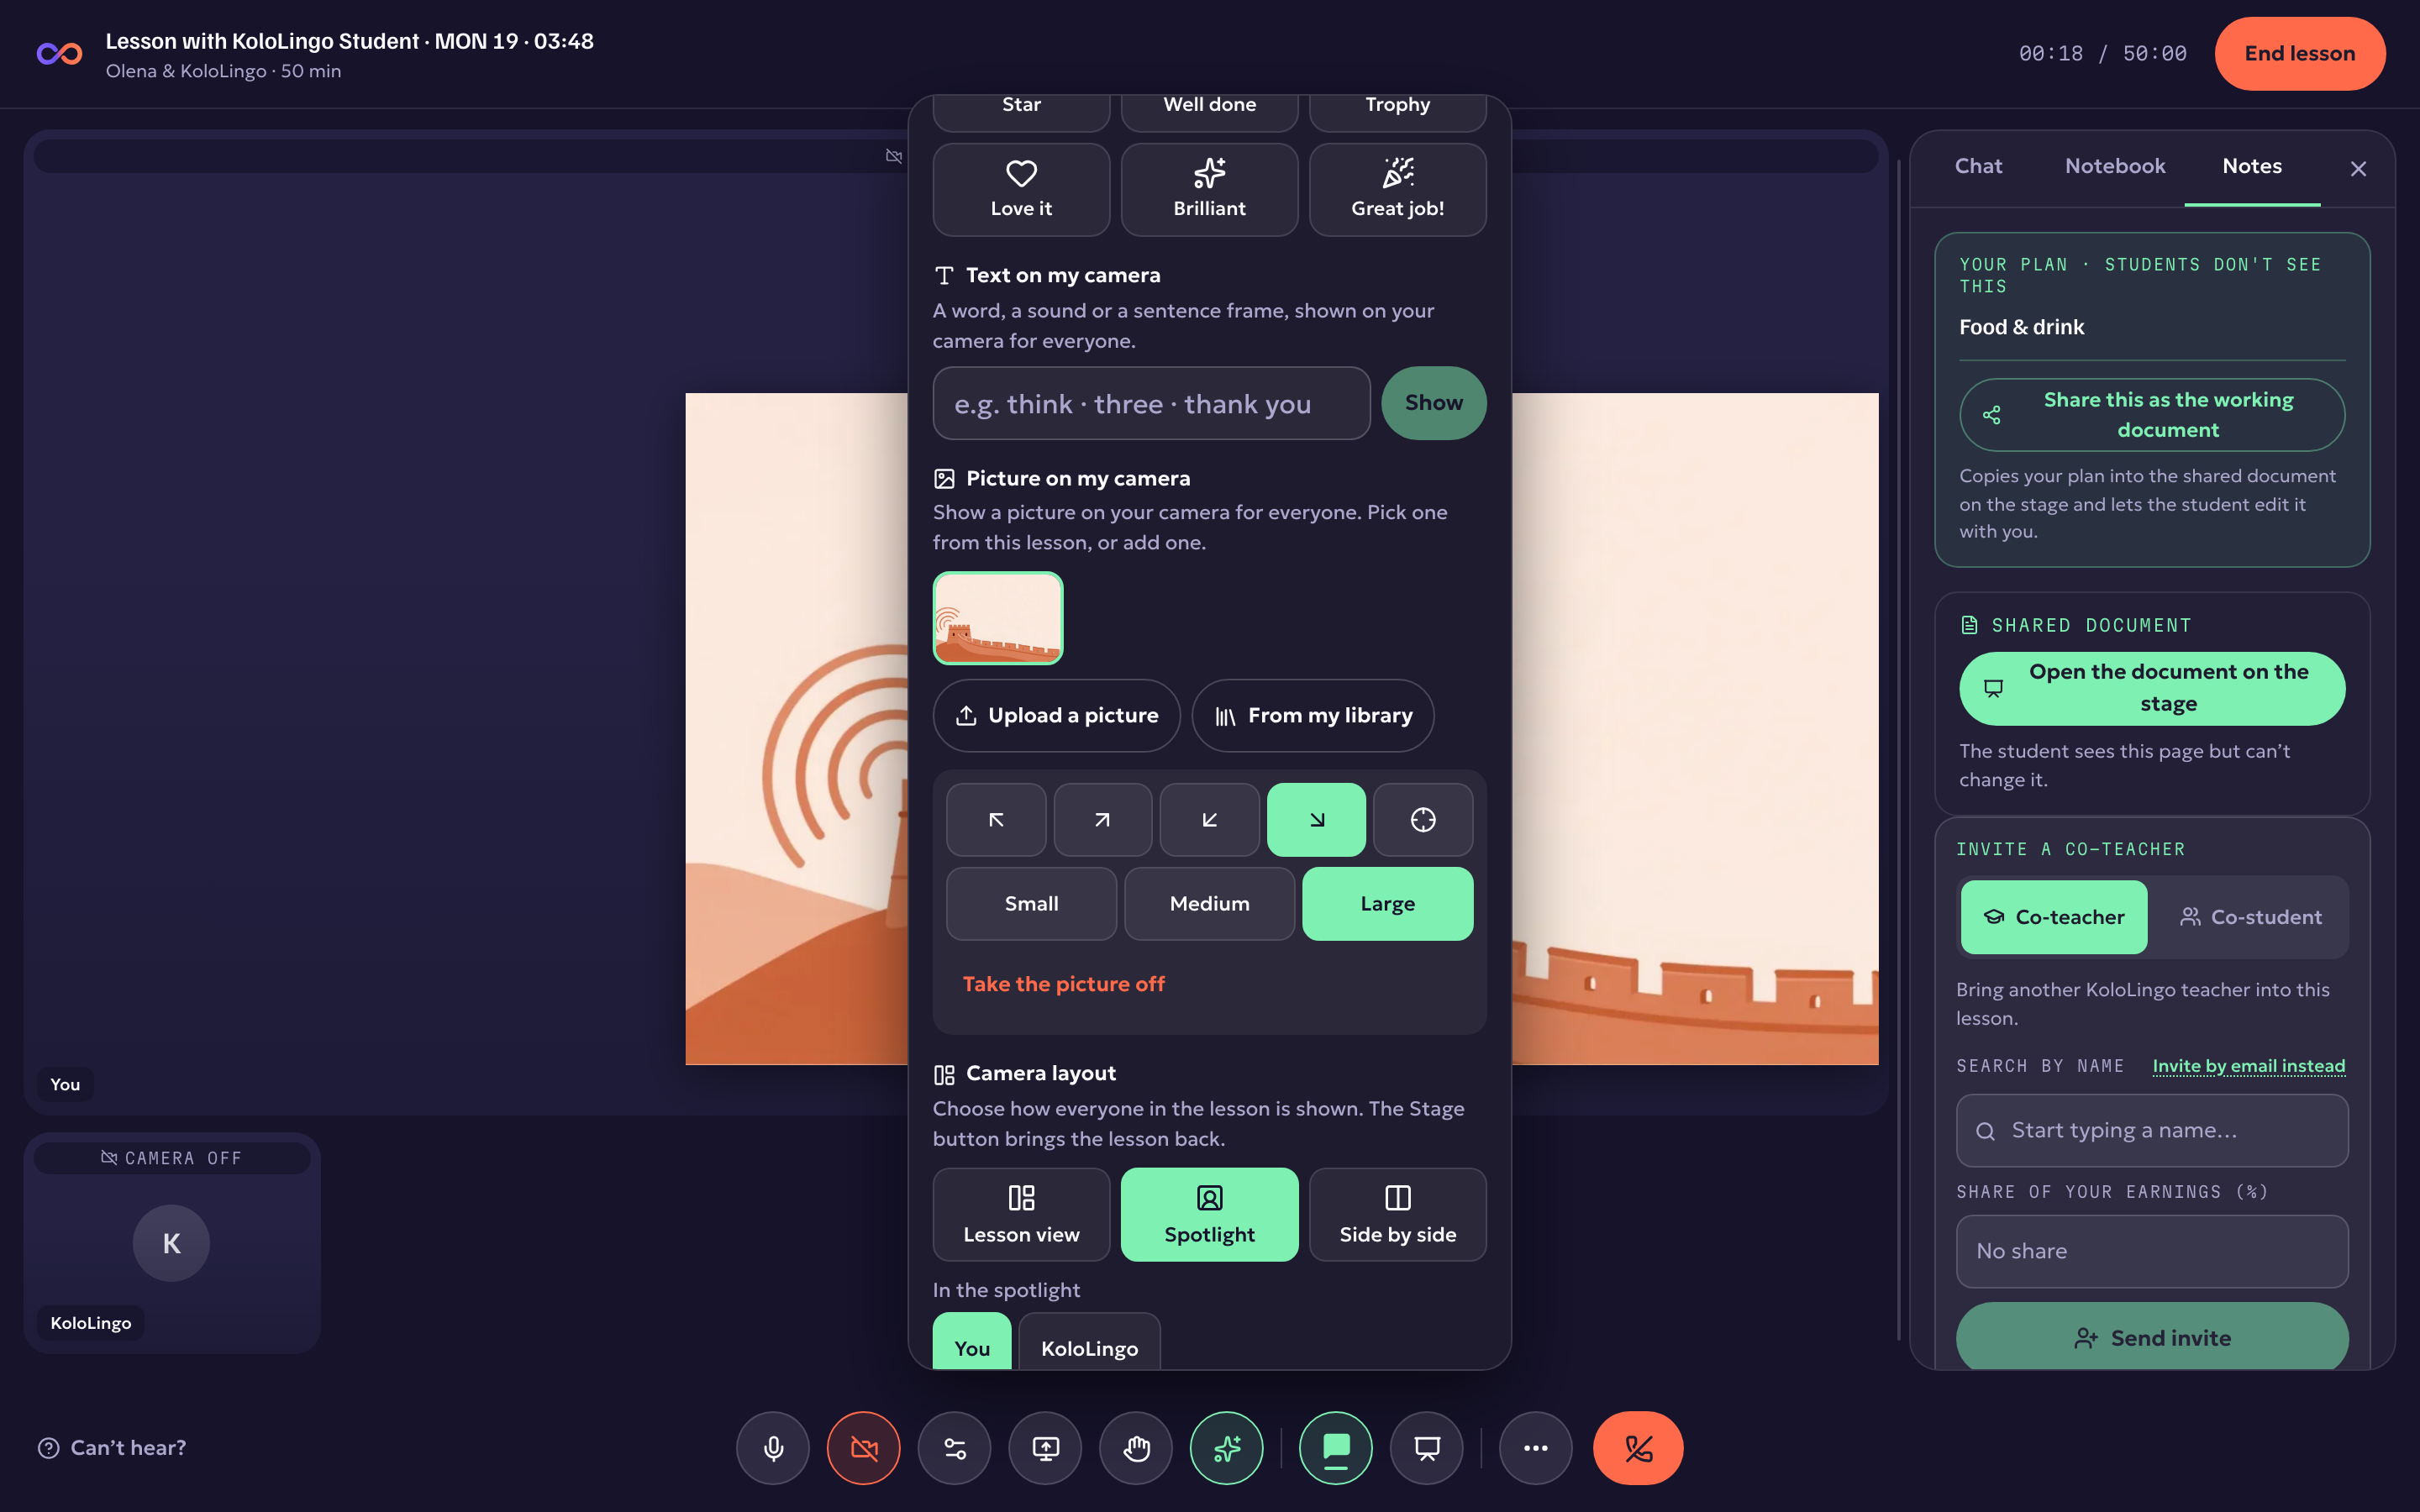
You can have one picture and one line of text on your camera at the same time. Students who join late or reconnect see your picture as soon as they arrive, it is in the lesson recording, and it goes when you leave. Pictures you upload here are added to the lesson's materials, so the student can open them later like any other material. Large photos are made smaller before they are sent, so they never slow the lesson down.
Camera layouts
Choose how everyone in the lesson is shown:
- Lesson view: the usual classroom, with the whiteboard or your materials in the middle and the cameras beside them.
- Spotlight: one camera big, everyone else small. It is you unless you choose someone else under In the spotlight. Good for pronunciation (your mouth, up close), show-and-tell, or a student presenting.
- Side by side: everyone the same size, for conversation practice.
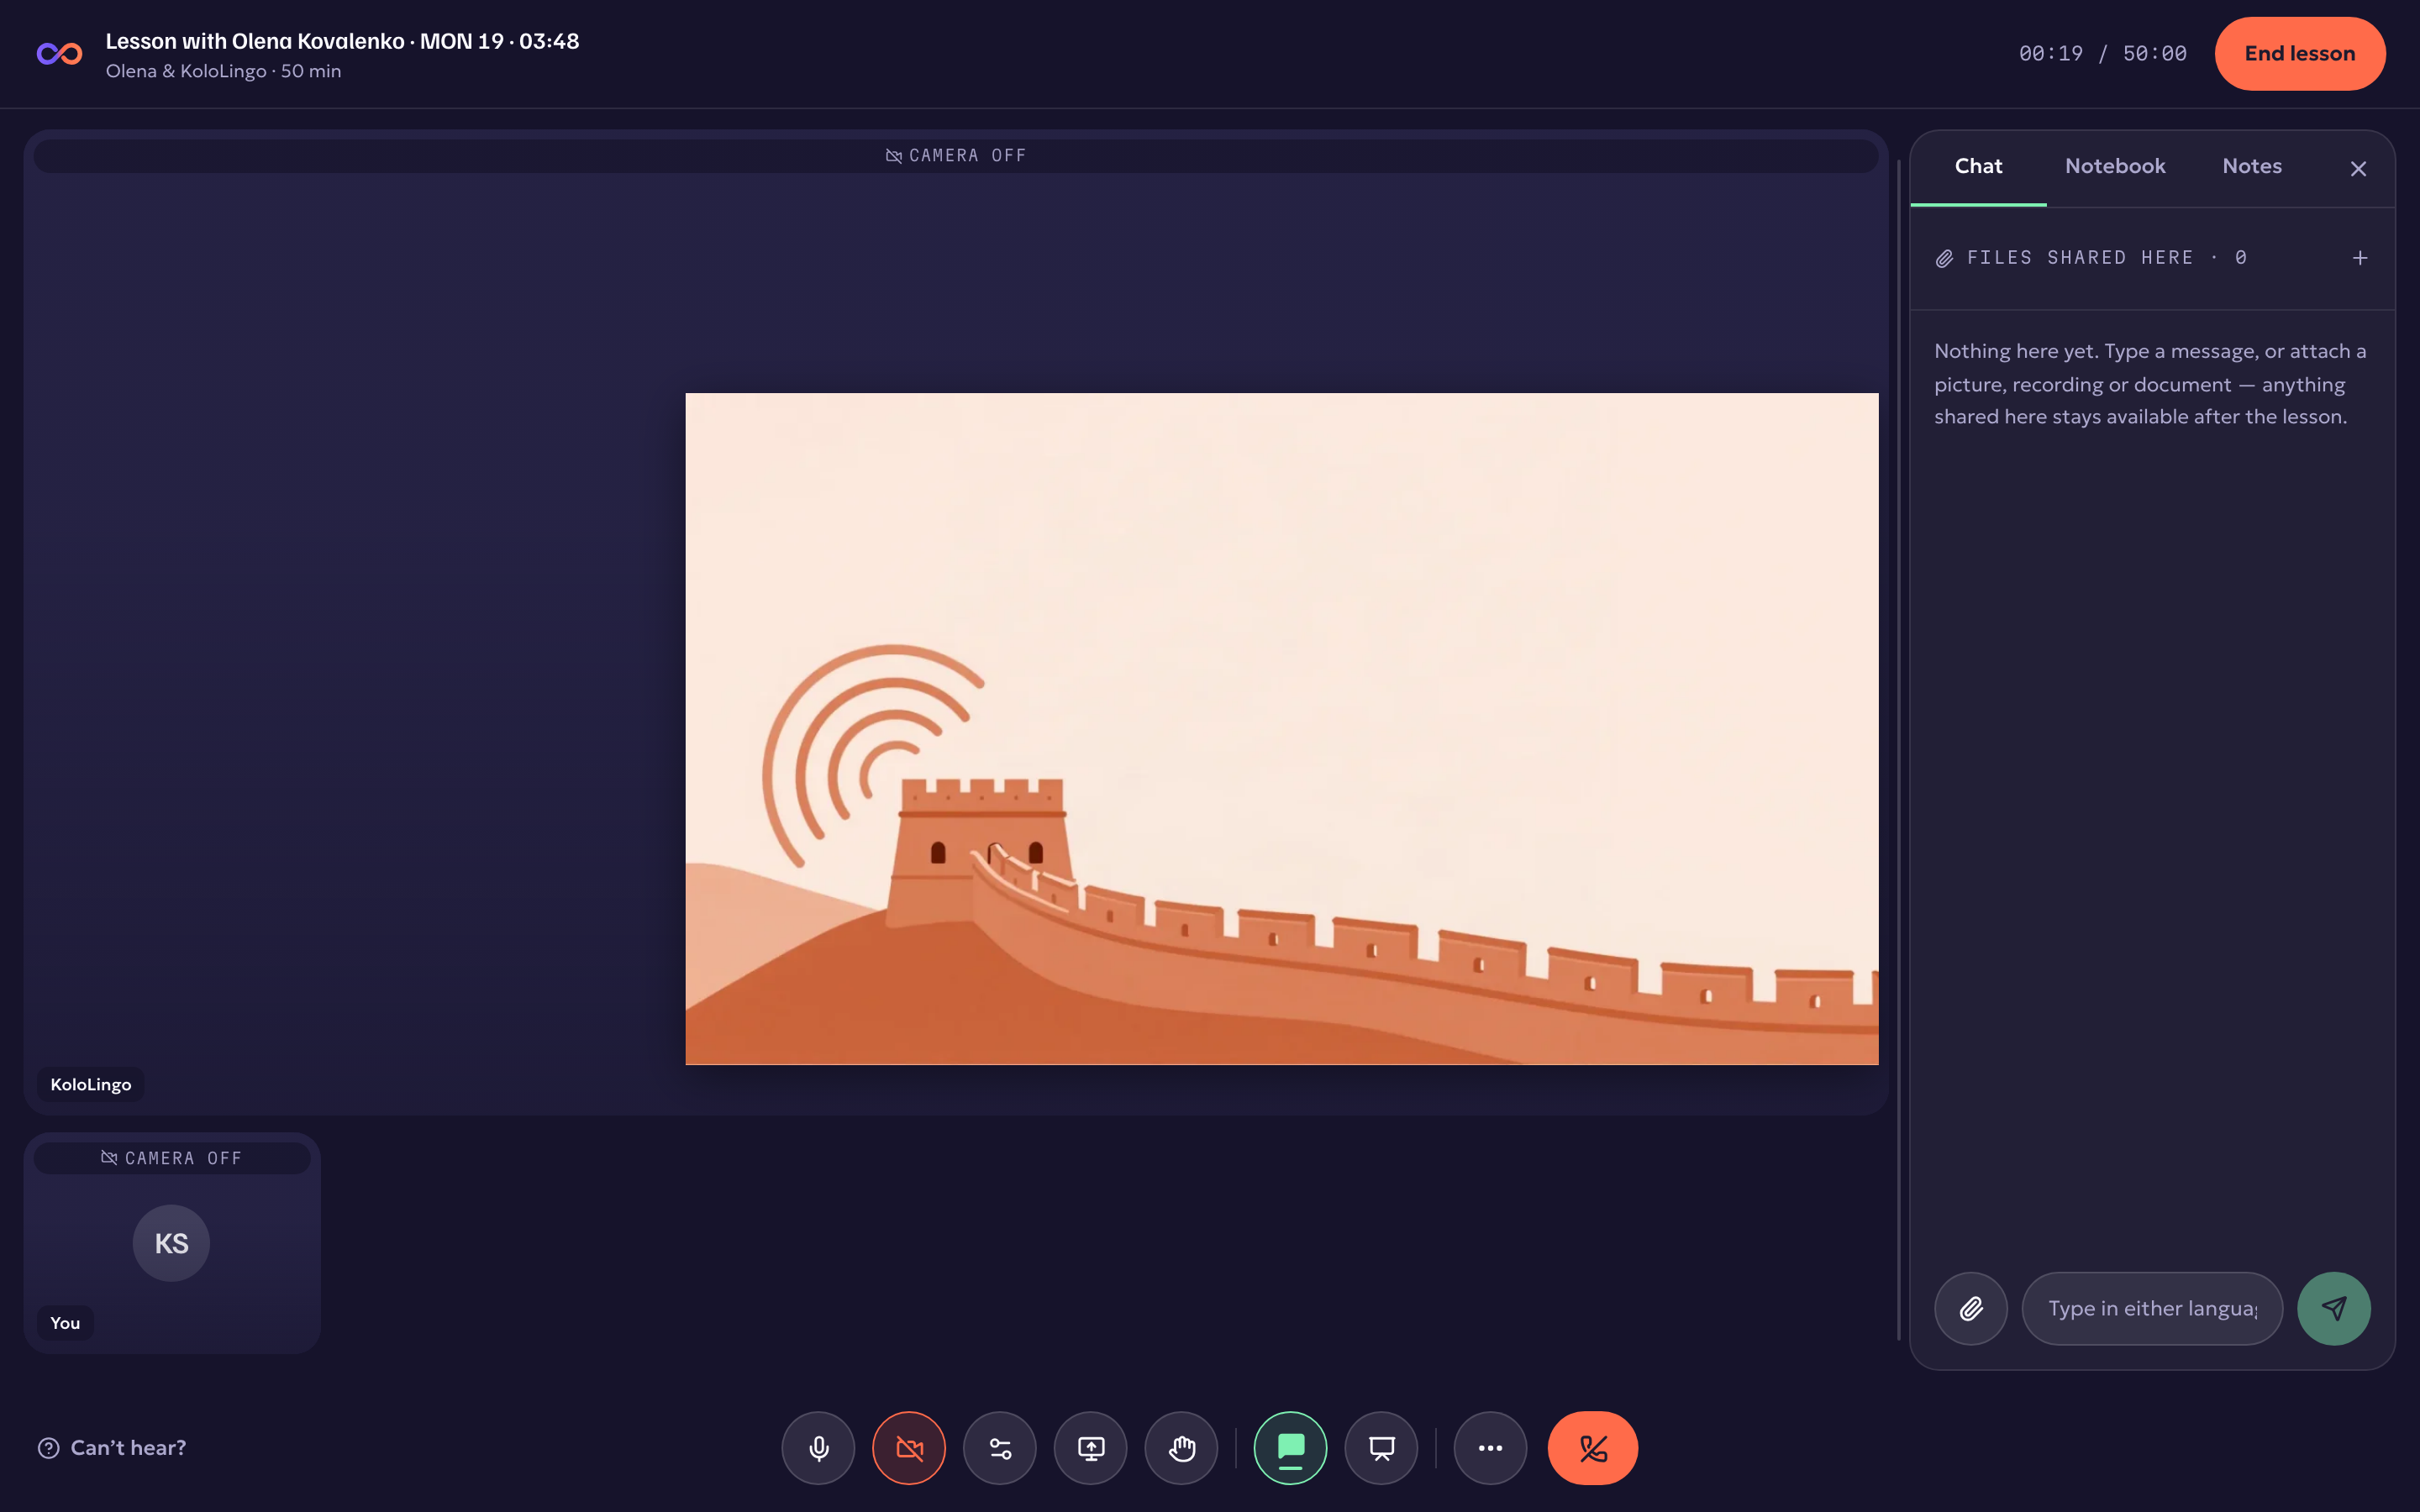
Your students follow your layout, and so does the recording. Nothing is lost while the cameras are big: the whiteboard, the open material and its page are all still there when you go back. To go back, choose Lesson view, or press the Stage button in the bottom bar.
A student who would rather keep the lesson on screen can press their own Stage button; that brings the lesson back for them only, until you choose a layout again.
While someone shares their screen, the shared screen stays in front; your layout comes back when the sharing stops.
In a lesson with a co-teacher, the layout is chosen by whoever is presenting. The other teacher can still use stickers, text and pictures on their own camera.
Blur or a picture behind you
Hide a busy room, or give your lessons a calm, tidy look. You and your students can each do this on your own camera; nobody can change anyone else's.
- In a lesson, open Audio and video settings: the settings button next to the camera button (on a phone, press ⋯ first).
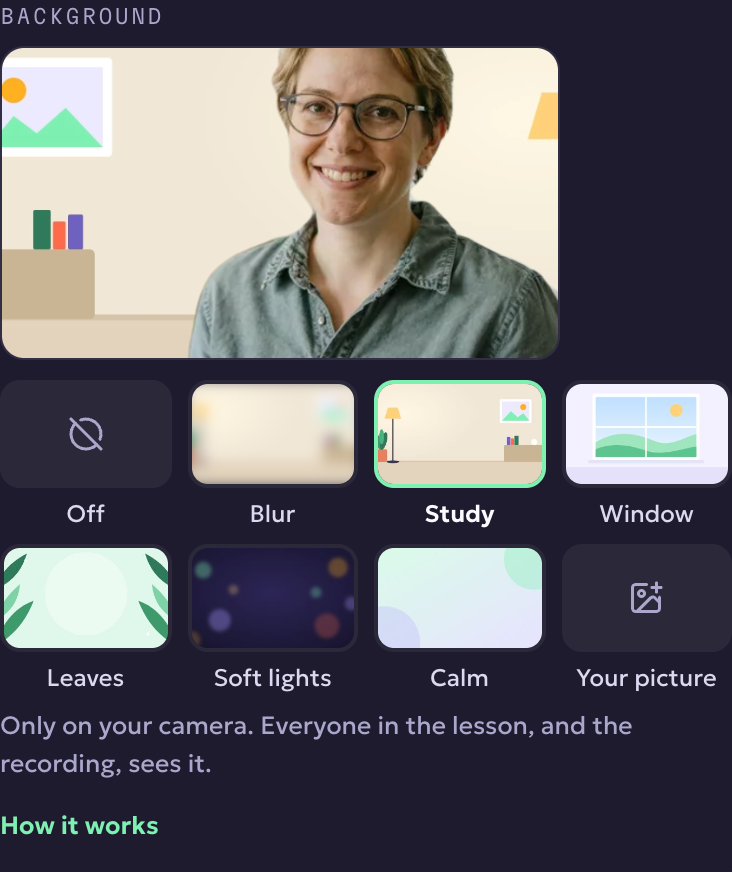
- Under Background, choose Blur, one of the pictures (Study, Window, Leaves, Soft lights, Calm), or Your picture to use a photo of your own.
- The small preview shows exactly what everyone sees. To turn it off, choose Off.
- It is never on unless you turn it on, and your choice is remembered on this computer and browser for your next lessons.
- The file of your own picture stays on this device; others see it only as part of your video. You can remove it any time with Remove your picture, and it is forgotten when you sign out.
- Everyone in the lesson sees your background, and so does the lesson recording.
- It works in up-to-date browsers and in the KoloLingo app for computers; if your browser can't do it, the setting tells you. In the phone app you can't add one yet, but you see other people's backgrounds.
- If your device has trouble keeping your video smooth with a background on, it turns itself off and tells you.
- The edges look best with good light on your face and a background that doesn't match your hair or clothes.
Touch-up and Low light
Under the backgrounds in Audio and video settings you'll also find:
- Touch-up: Off, Light or Strong. It softens skin a little and adds a touch of light and colour. Only skin is smoothed, never your room, hair or clothes.
- Low light: brightens your video when the room is dim.
Both work with or without a background, are remembered on this device, and everyone in the lesson (and the recording) sees the result. If your computer struggles to keep the video smooth, the room turns these effects off by itself and tells you.
Good to know
- To close the panel, press Escape or the ×.
- Stickers are limited to about three per second, so a double-click doesn't flood the screen.
- People who prefer reduced motion on their device see the sticker without the pop animation.